How to plan a pergola? A comprehensive guide

Determination of needs and analysis of space
Let's start with the most important question: what will you mainly use the pergola for? Maybe you dream of a cozy place for an afternoon siesta with a book? Or are you planning to create an outdoor dining area where you will host family dinners? Or do you need a comfortable space for remote work overlooking the garden? Determining the main function will help us choose the right dimensions and equipment.
Consider the number of people who will regularly use the pergola. For a family of four who want to create a seating and dining area, we recommend a space of at least 4x4 meters. Such a dimension will allow you to freely fit a table with chairs and an additional seating area. If you plan to receive guests frequently, it is worth considering a larger dimension, for example 4.5x5 meters, which will provide comfort even for 8-10 people.
When planning the space, also remember the place for the equipment. A standard set of garden furniture (table + 6 chairs) occupies about 12m², but you also need space for free movement. In addition, there is room for additional elements - maybe an electric grill? Lounge area with sofa? Or a work corner? Each such element requires additional area.
The next step is to accurately measure the available space. Take into account not only the area for the pergola itself, but also the space needed to operate it. A standard bioclimatic pergola can have dimensions of a maximum of 4.5x7 meters in one module, but be sure to maintain adequate distances from the boundaries of the plot or other objects. Also pay attention to obstacles that can affect the installation - trees, shrubs, underground installations or architectural elements of the building.
A good practice is to make a simple sketch of the space with the dimensions and potential obstacles plotted. Also mark the directions of the world - this will be crucial when planning the orientation of the pergola, especially if you opt for a model with photovoltaic panels in lamellas. Such a sketch will be an invaluable help when consulting with a technical advisor.
It is also worth considering the seasonality of use. Bioclimatic pergola with full equipment (ZIP shutters, heating, lighting) allows you to use the space most of the year. If you plan intensive use in spring and autumn, pay special attention to heating and lighting systems, which will significantly extend the period of comfortable use.
Also, be sure to analyze the potential limitations. Check that there are no problems with the drainage of rainwater at the site of the planned installation. Make sure that the substrate is sufficiently stable. If you plan wall mounting, evaluate the condition of the facade and the possibility of securely fixing the structure.
[Link to article 6 - “Complete pergola configuration"] will help you think more carefully about the issues of additional equipment, and [Link to article 2 - “Types of pergolas"] will allow you to better understand the options available and their impact on functionality.
Did you know that...? Studies show that a properly planned bioclimatic pergola can reduce the need for air conditioning in adjacent rooms by up to 70%! This is not only comfort, but also tangible savings on electricity bills. That is why it is so important to think carefully about the location and orientation of the pergola relative to the building.
Choosing the perfect location
Choosing the right pergola location is one of the most important planning elements that will affect the comfort of use for years to come. This process requires consideration of several key aspects, which we will discuss in detail.
Let's start with the analysis of insolation. It is worth watching for several days how the sun wanders around the plot at different times of the day. It is best to do this at three times: morning (8-10), noon (12-14) and afternoon (16-18). Pay special attention to natural shading from buildings or tall trees - this will help you better plan the location of the pergola. It is good practice to make simple photographic documentation during these hours - it will be invaluable when consulting with the designer.
For the Solar Breaker solar pergola, orientation is of additional importance due to the photovoltaic panels in the slats. The optimal orientation is the south or southwest direction - this will give you the best energy efficiency. The double axis of rotation of the slats system [Link to article 13 “Technologies and innovations in premium pergolas"] allows the angle of inclination to be precisely adjusted to the position of the sun, maximizing energy production.
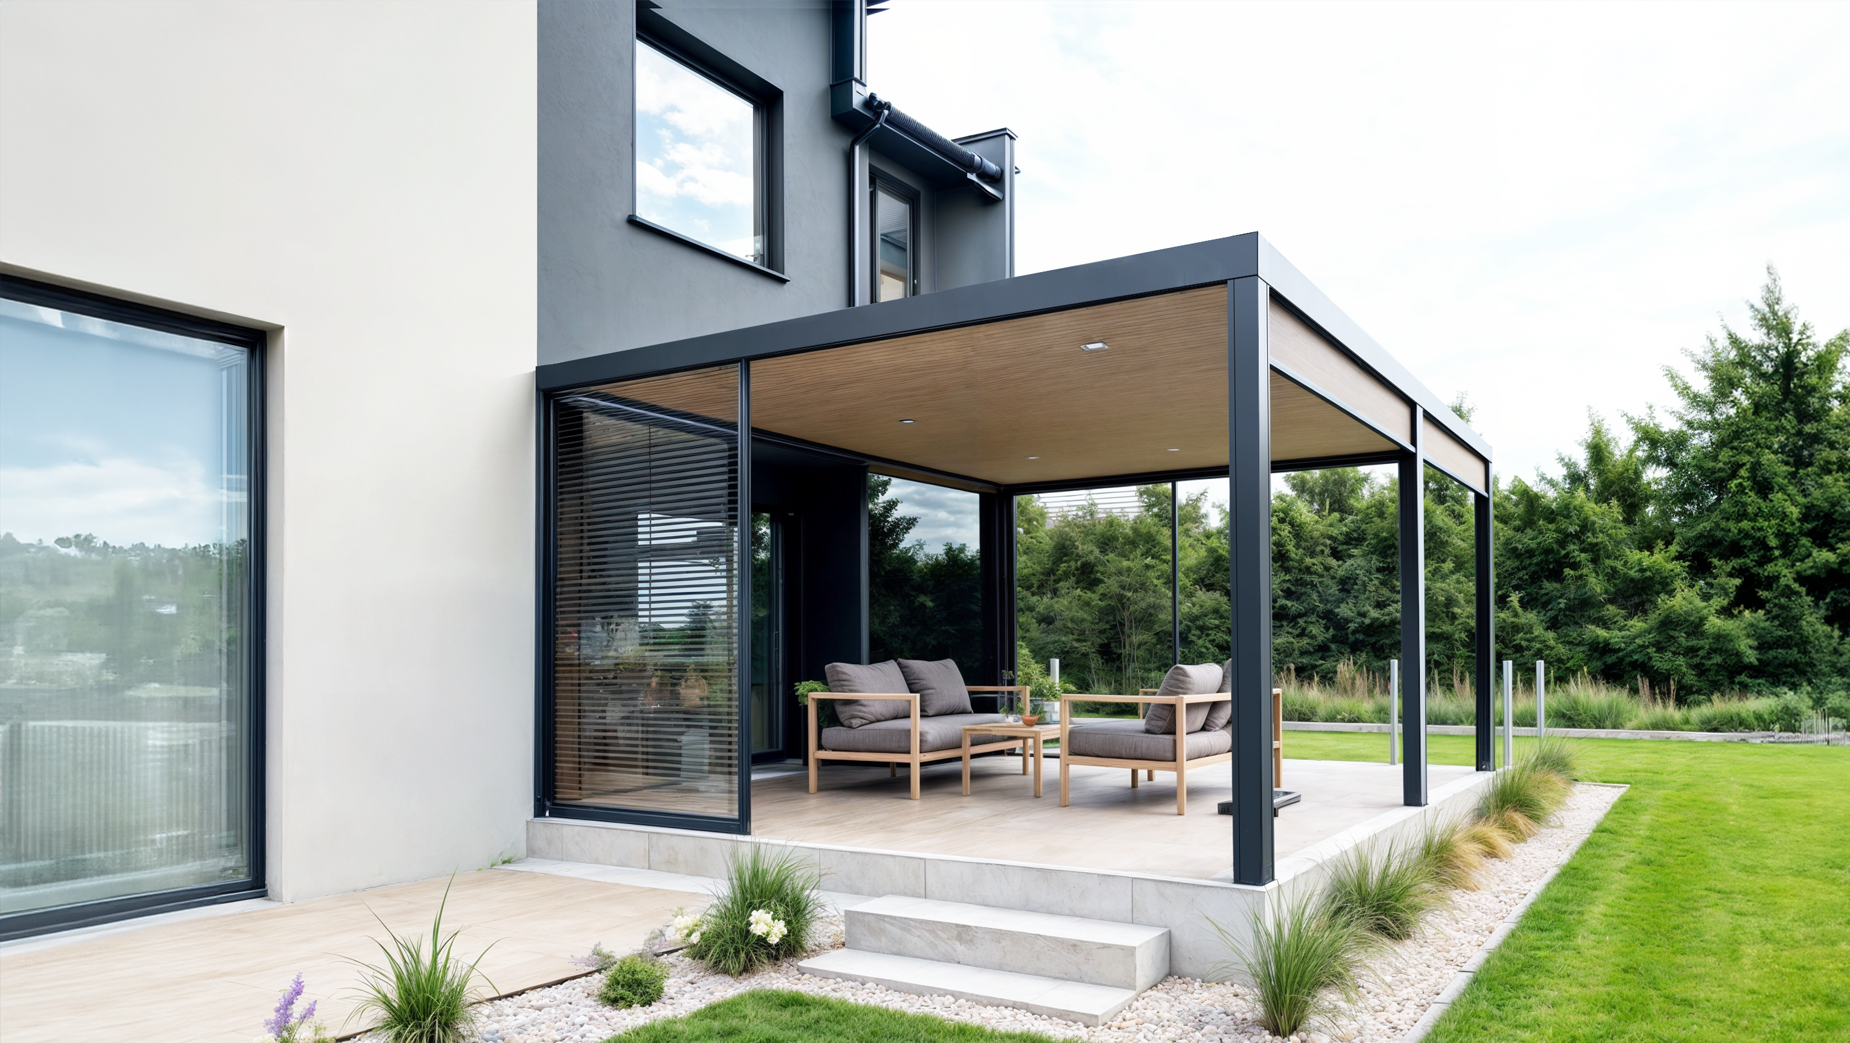
Distance from the building is another important aspect. For wall mounting, the pergola must be installed at the right height relative to the windows and doors - so as not to limit the access of light to the interior of the house. As a standard, it is recommended to install the upper edge of the pergola at least 20 cm above the upper edge of the window. If you are planning a free-standing pergola, keep a minimum of 1 meter distance from the walls of the building - this will facilitate cleaning and maintenance.
Integration into the existing garden layout requires special attention. The pergola should naturally blend in with the surroundings and existing communication lines. Think about how you will get to it - is the path wide enough? Will the passage be comfortable during the rain? Also remember about the view - both from the pergola to the garden and from the house to the pergola.
The assessment of the substrate is also crucial. A bioclimatic pergola is a solid structure that requires a stable foundation. If you plan to install on an existing terrace, it will be necessary to verify its bearing capacity. When installing on the ground, it will be necessary to make suitable point foundations. Pay attention to the terrain - even a slight slope may require additional leveling work.
Do not forget about the analysis of the direction of the wind. Although Solar Breaker pergolas are resistant to gusts of up to 120 km/h, it is worth considering the location so that the ZIP shutters protect against prevailing winds in your area. [Link to article 7 “Sun and rain protection systems"] will help you better understand the possibilities of wind protection.
It is equally important to plan the drainage of rainwater. The pergola is equipped with an integrated gutter system, but you need to plan where this water will be drained. You can direct it to an existing drainage system, use it to irrigate the garden or drain it directly into the ground - it all depends on local conditions and your preferences.
Matching the pergola to the architecture
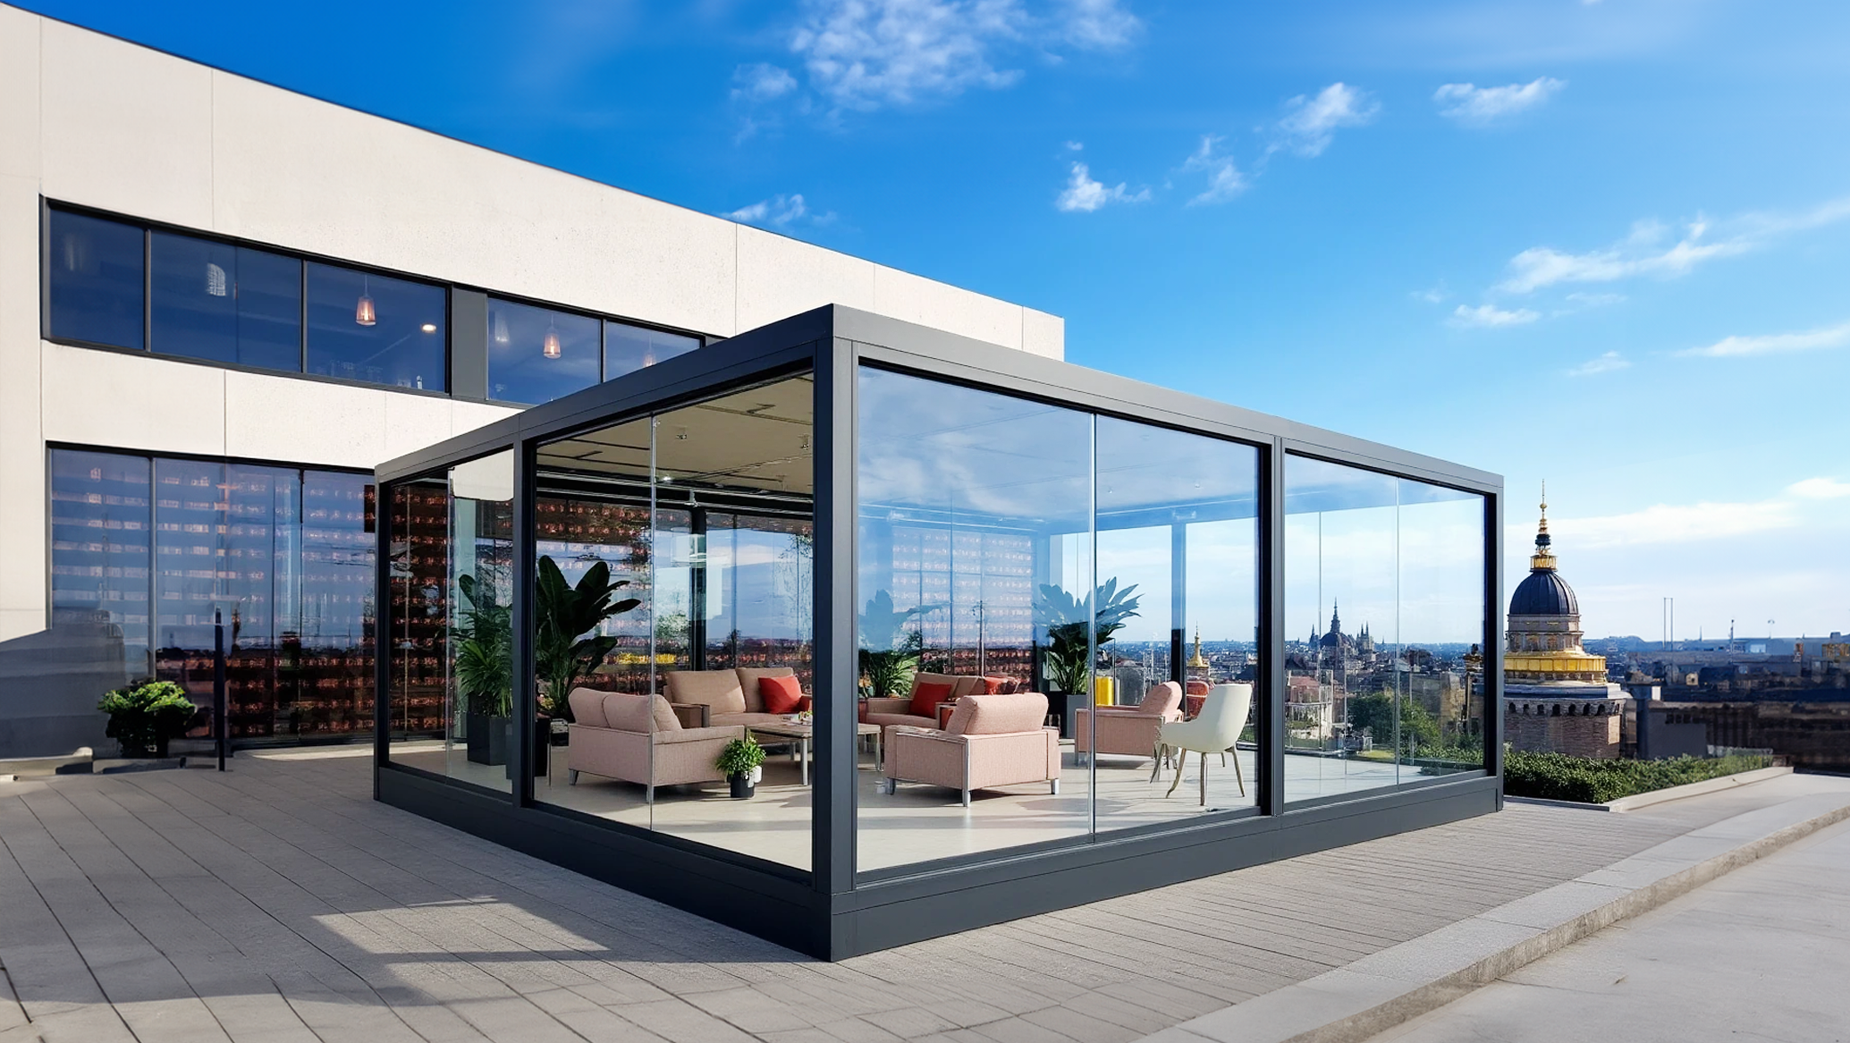
A bioclimatic pergola is not only a functional addition to the house - it is an element that should harmoniously blend in with the architecture of the building and the surroundings. That is why it is so important to thoughtfully fit it into the existing stylistics.
The first step is to carefully analyze the architectural style of your home. Pay attention to the dominant lines - are they simple and minimalist, or does the building have more ornate, classic elements? Solar Breaker pergolas, thanks to their modular design and uniform 15x15 cm profiles, blend perfectly with both modern and traditional architecture. The key is the right choice of finish and accessories.
When choosing a pergola model, consider the proportions of the building. For example, with a large two-story block of the house, it is worth considering a pergola of greater height (up to 320 cm as standard) or a combination of several modules that will create a more balanced composition. For smaller single-family homes, a single, compact module is often better.
The color of the structure is another important element. Solar Breaker pergolas are available in all RAL colours at no extra charge. So you can perfectly match the color to the window joinery, facade or other architectural elements. The most popular choices are anthracite (RAL 7016), which goes well with modern architecture, and classic white (RAL 9016). [Link to article 6 “Complete pergola configuration"] will help you to know the full palette of available finishes.
For wall mounting, special attention should be paid to integration with the facade. The Solar Breaker pergola mounting system is designed to minimize interference with the facade. All mounting elements are discreetly hidden for a clean, aesthetic appearance. However, it is worthwhile to check the condition of the facade in advance and, if necessary, plan its reinforcement at the installation sites.
When planning an electrical installation, think in perspective. A bioclimatic pergola requires power to control the slats, LED lighting and ZIP shutters. In the case of a solar model, it is also necessary to plan a connection to the electrical network of the house (on-grid system) or provide a place for a battery bank (off-grid system). All wires are elegantly hidden in the design, but you need to properly plan their supply.
It is also worth thinking about integrating a pergola into a wider space development project. Maybe it is worth combining it with a terrace system? Or plan a consistent path leading to the pergola? A good solution is also a color and stylistic synchronization with other elements of landscape architecture, such as a fence or garden lighting elements.
Do not forget about lighting - both functional and decorative. As standard, the Solar Breaker pergola is equipped with LED lighting in the crown profiles, but you can also add spot lighting in the slats. This is not only a practical matter, but also a way to create the right mood in the evening. [Link to article 11 “Arrangement of space under the pergola"] will tell you more about the possibilities of lighting.
Did you know that...? The use of uniform 15x15 cm profiles in Solar Breaker pergolas is no accident. These proportions were chosen according to the principle of golden division, which for centuries has been recognized as the ideal of harmony in architecture. This is why the pergola, despite its considerable size, gives the impression of a light and elegant structure that does not overwhelm the environment.
How to plan a pergola? Comprehensive guide (continued)
Technical and formal aspects
Before embarking on your bioclimatic pergola project, it is worth familiarizing yourself with the formal requirements and technical aspects of the installation. I will walk you through the most important points to consider.
Let's start with the formal issues. Does a pergola require a building permit? In most cases, no - a bioclimatic pergola is classified as an element of small architecture. However, it's always a good idea to check with your local architecture department, as regulations may vary from location to location. Particular attention should be paid to areas under conservation protection or a local zoning plan, which may include additional requirements.
If you are planning a solar version of the pergola, you must also report the photovoltaic installation to your local power plant. This is especially important in the case of an on-grid system, that is, connected to the energy network of the house. [Link to article 14 “Smart solar pergola"] explains in detail the process of connecting to the grid and the available configuration options.
It is also a good practice to inform the neighbors about the planned investment. While this is not a formal requirement, it can prevent potential misunderstandings in the future. Especially if the pergola is to stand close to the border of the plot or it can affect the insolation of neighboring properties.
Let's move on to the construction aspects. Foundations are a key element that must be properly designed for soil conditions and structural loads. As standard for a free-standing pergola, four foundation feet are made with dimensions of about 40x40 cm and a depth of at least 80 cm (below the freezing zone). For wall mounting, two feet are sufficient.
Media connections are another important issue. The pergola will need to be supplied with electrical power - ideally with a minimum of 3x2.5 mm² protected by a residual current circuit breaker. If you plan to install an audio system or additional sockets, it is worth providing for a more powerful connection. In addition, if you are going to install an automatic watering system for plants near the pergola, you should plan the water supply.
Particular attention should be paid to the issue of rainwater drainage. Pergola Solar Breaker has an integrated gutter system in the structural profiles and legs, but you need to plan where this water will be discharged. Depending on local conditions, you can:
- drain water into an existing storm drain
- direct it to the retention tank
- distribute to the garden through a drip system
When planning, also consider the service space. Although Solar Breaker pergolas are practically maintenance-free, it is worth providing access to mechanisms in case of need of maintenance or adjustment. It is especially important to preserve access to the motors in the lamellas and zip-shutters.
Did you know that...? The Solar Breaker bioclimatic pergola is designed to meet the requirements of the European standard EN 1090-1, which specifies requirements for aluminum structures. This means that it can withstand snow loads of up to 200 kg/m² and gusts of wind up to 120 km/h - this is more than standard terrace roofs or awnings!
Checklist before buying
Planning a bioclimatic pergola is a complex process, so I have put together a comprehensive checklist to help you make sure all the essential aspects have been thought out and planned.
Let's start with the technical characteristics. The basis is to accurately determine the dimensions of the pergola. Remember that for a Solar Breaker pergola, the maximum dimensions of a single module are 4.5 x 7 meters (with an additional support leg) or 4.5 x 5 meters (without an additional leg). Pay special attention to the height - a standard height of up to 320 cm should provide a comfortable space, but this is worth verifying, especially if you plan to install glazing or have a high terrace door.
Let's move on to the preparation of the site. The surface under the pergola must be perfectly level and the ground sufficiently stable. When installing on an existing terrace, it is necessary to check its bearing capacity and technical condition. If you plan to mount on the ground, then you need to include the work on the construction of the foundation. [Link to Article 8 “Order Execution Process"] accurately describes the requirements for the preparation of the substrate.
A set of documents is another important element. Depending on local requirements, you may need:
- situational sketch showing the location of the pergola on the plot
- electrical system design (especially with solar version)
- technical documentation of the pergola (we provide it in the order process)
- application of photovoltaic installation to a power plant (for solar version)
The implementation schedule should take into account several key stages. The installation of the pergola itself usually takes 2-3 days, but the whole process from the order to the completion of the installation can take from 6 to 8 weeks. The schedule should include:
- production time (4-6 weeks)
- site preparation (1-2 weeks, depending on the scope of work)
- assembly of the structure (2-3 days)
- electrical installation and automation configuration (1 day)
- Technical acceptance and service training (0.5 days)
Financial issues also require careful planning. The budget should take into account not only the cost of the pergola itself, but also:
- preparatory and foundation work
- electrical installation
- additional equipment (ZIP shutters, glazing, audio system)
- transport and assembly
- possible finishing works (e.g. making a terrace floor)
In the case of the solar version, it is worth checking the available subsidy programs - a pergola with photovoltaic panels may be eligible for the thermomodernization allowance or the “My Power” program. [Link to article 5 “Costs and financing of pergolas"] discusses in detail the available financing options.
After analyzing all aspects, it is worth making an appointment with the Solar Breaker Technical Advisor. During the on-site visit, it will be possible to verify all assumptions and clarify technical details. The advisor will also help you choose the optimal configuration and suggest the best solutions for your specific situation.
Did you know that...? A well-planned bioclimatic pergola can increase property value by up to 7-10%? It is more than a traditional terrace covering or awning. The key is professional design and execution that will make the pergola an integral part of your home's architecture, not just a seasonal addition.
Solar Pergolas